A new water heater is an investment in comfort and efficiency, but ensuring that it’s installed correctly is just as important as selecting the right model. Once your installer leaves, it’s up to you to confirm that everything is functioning as it should. From checking for leaks to verifying temperature consistency, these post-installation inspections can save you from costly future repairs and potential safety risks. We will explore the key indicators that your water heater has been installed properly and what to look for during your inspection to confirm its performance and reliability.
How to Inspect Your Water Heater After Installation
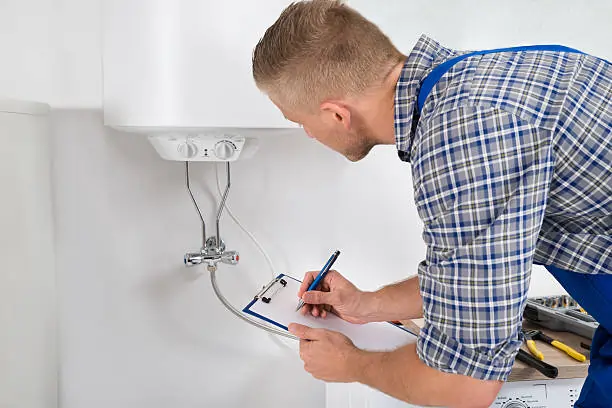
1. Check for Any Leaks or Drips
One of the first signs of a proper water heater installation is a dry and secure setup. Take a close look around the base of the tank, the inlet and outlet pipes, and any connected valves for moisture, dripping, or pooling water. Even a small leak can lead to corrosion, water damage, or higher utility bills over time. A correctly installed water heater should have tight fittings, clean joints, and properly sealed connections. If you’re unsure about what you’re seeing, contacting a local plumber in Simpsonville, SC can help ensure your installation meets proper safety and performance standards. Make sure the temperature and pressure relief (T&P) valve is not leaking, as this component is crucial for safety. If you notice any water accumulation, it might indicate a loose connection or improper sealing. Catching a small drip early can prevent major problems later, ensuring that your installation is both safe and long-lasting.
2. Verify Proper Ventilation and Airflow
For gas water heaters, ventilation is one of the most critical aspects of a proper installation. Inspect the vent pipe to ensure it is securely attached, free of obstructions, and properly angled upward toward the exterior vent. This design allows exhaust gases to flow safely out of your home. A poorly vented heater can cause dangerous carbon monoxide buildup or reduced efficiency. The vent connections should be tight, and you shouldn’t smell gas or notice soot around the top of the unit. If you have an electric water heater, make sure the area around it has sufficient airflow to prevent overheating and maintain safe operation. Confirming correct ventilation helps ensure your water heater runs safely and efficiently for years to come.
3. Confirm Consistent Hot Water Supply and Temperature Settings
After installation, test the water temperature at several faucets in your home. A well-installed water heater should provide consistent hot water without fluctuations or delays. The ideal setting for most households is around 120°F, which offers a comfortable temperature while conserving energy and reducing the risk of scalding. If you notice sudden temperature drops, unusually long wait times for hot water, or excessively high heat, it could indicate improper calibration or a connection issue. The thermostat should be clearly labeled and easily adjustable. Additionally, ensure the hot water supply meets your household’s needs—running out of hot water too quickly may indicate a sizing or installation issue. Consistent performance reflects both quality equipment and professional workmanship.
4. Listen for Unusual Soubnds
A properly installed water heater should run quietly, with only a faint hum or occasional soft noise during heating cycles. Strange sounds—such as banging, popping, or hissing—can indicate air trapped in the system, sediment buildup, or improper pressure levels. Immediately after installation, some mild noise is normal as the tank fills and expels air, but ongoing or loud sounds are not. The installer should have flushed the system to remove debris and sediment before connecting it to your plumbing. If these sounds persist, check for loose parts or uneven water pressure. Silent, steady operation means the system is balanced and running as it should, signaling a solid installation and healthy performance.
5. Inspect Electrical or Gas Connections
Whether your water heater runs on electricity or gas, the connections must be inspected carefully to ensure they are secure and functioning properly. For electric models, verify that the wiring is properly insulated, with no exposed or frayed wires, and that the breaker corresponding to the heater is labeled and functioning properly. For gas models, ensure the gas shutoff valve is easily accessible and the supply line is securely connected. You should not smell gas—any odor could indicate a dangerous leak that requires immediate attention. The pilot light should burn steadily with a blue flame, not flickering or producing yellow edges. These inspections confirm that your energy source is safe, stable, and delivering power efficiently, ensuring your water heater operates without risks or interruptions.
6. Review the Pressure and Relief Valve Operation
The temperature and pressure relief (T&P) valve is a safety mechanism designed to prevent excessive pressure or temperature inside the tank. To test its function, carefully lift the lever to release some water—this ensures it opens and closes properly. Water should flow freely through the discharge pipe and stop when you release the lever. If the valve doesn’t respond, leaks continuously, or fails to release water, it may have been installed incorrectly or could be defective. This component protects your home from potential tank ruptures or overheating incidents, making its correct installation and operation critical. Inspecting the discharge pipe to ensure it points downward and terminates near the floor is also essential for safe water release.
Inspecting your water heater after installation gives you confidence that your investment is secure and performing efficiently. From checking for leaks and testing temperature consistency to verifying ventilation and drainage, these simple steps can help you confirm the quality of the installation. A properly installed system operates quietly, safely, and economically, offering dependable comfort for years to come. Taking the time to perform these checks not only ensures the work was done correctly but also helps prevent costly repairs or replacements in the future, giving you peace of mind and long-term value in your home’s plumbing system.
Read more: How Selling a Property for Cash Can Streamline the Home Selling Journey – Blessingscore.com
Common Causes of Accident Claims and How to Prevent Them – Blessingscore.com
Moraine Lake Sunrise Tours vs. Day Tours: Which Should You Choose? – Blessingscore.com